Introduction: Why trezor.io/Start Matters
If you’ve just bought a Trezor hardware wallet (Model One, Model T, Safe series, or similar), the first page you’ll visit is often trezor.io/Start. This is not just a landing page — it is a secure gateway, a guided installer, and the first line of defense for your crypto assets.
In plain words: trezor.io/Start helps you set up your device correctly, safely, and in a way that keeps your private keys secure. Because many mistakes in crypto happen (seed phrase mismanagement, phishing, firmware tampering), going through this official setup path is vital.
In this article, we'll start with what trezor.io/Start is, how it works step by step, and then expand into intermediate considerations: security nuances, advanced features, pitfalls to avoid, and best practices. By the end, you’ll feel confident in setting up and maintaining your Trezor device safely.
What Is trezor.io/Start?
Simply put, trezor.io/Start is the official setup portal provided by Trezor. It serves multiple roles:
- Guides you to download the correct **Trezor Suite** (or connect via browser/web) :contentReference[oaicite:0]{index=0}
- Launches the firmware installation process if your device is fresh or outdated :contentReference[oaicite:1]{index=1}
- Walks you through wallet creation, seed phrase backup, PIN setup, passphrase (optional) :contentReference[oaicite:2]{index=2}
- Ensures you’re using verified software and not falling prey to fake or malicious tools
When you go to the page, you’ll see instructions such as: “Download Trezor Suite,” “Plug in your device,” “Initialize your wallet,” etc. :contentReference[oaicite:3]{index=3}
The crucial point: *Your private keys never leave the device*. All signing (approving transactions) happens on-device. trezor.io/Start just orchestrates the safe onboarding.
Step-by-Step: Setting Up via trezor.io/Start
Below is a fleshed-out version of what you’ll see and do. Think of it as walking alongside you.
1. Unbox & Connect
You receive your Trezor device in sealed packaging. Before doing anything, check the ribbon seals or holograms for tampering. If anything looks off, don’t proceed — contact support. Then connect it to your computer with the USB cable. Many instructions stress: use the original cable, avoid hubs, avoid unknown public computers.
Example: You plug in your Trezor Model T; the device screen boots to show a greeting or instructions like “Go to trezor.io/Start.”
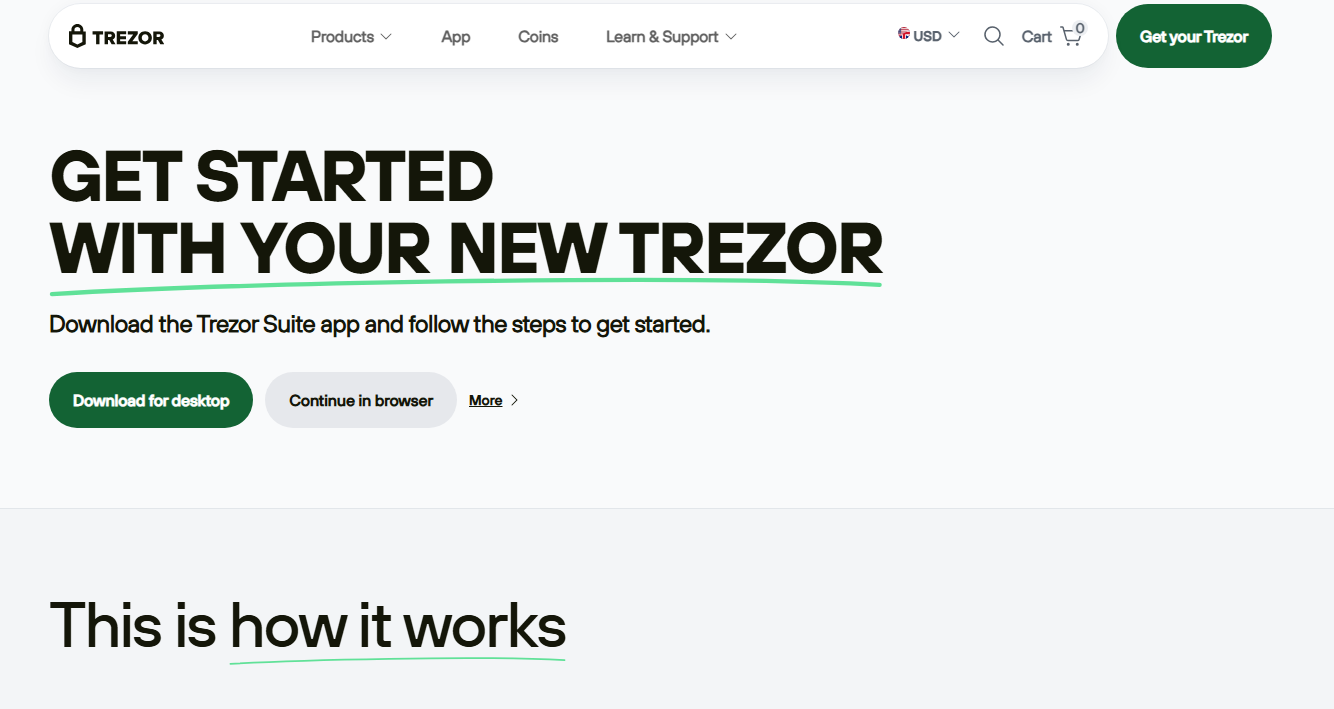
2. Visit trezor.io/Start & Download Suite / Bridge
In your web browser, go to trezor.io/start. The page will detect your operating system (Windows/macOS/Linux) and suggest the correct download. :contentReference[oaicite:4]{index=4}
If you prefer, some platforms allow a browser/web-based variant (Suite in browser) instead of desktop software. :contentReference[oaicite:5]{index=5}
What’s the difference? The desktop app tends to have more features and reliability; the browser version is convenient. But in both cases, you’re working with a verified, cryptographically signed app from the official site.
3. Firmware Installation or Update
When your device is brand new, it usually arrives without firmware or with a version that needs updating. The setup flow will prompt you to install the latest firmware. :contentReference[oaicite:6]{index=6} Follow the on-screen instructions—usually “Install firmware,” then confirm on the device. It typically takes a minute or two.
After installation, the device reboots and re-connects, and the Suite or web app will verify its authenticity.
4. Create or Recover Wallet
You now have two options:
- Create a new wallet — for most users starting fresh.
- Recover wallet — if you already have a seed phrase from a previous wallet. Use that to restore your accounts. :contentReference[oaicite:7]{index=7}
If creating new, you’ll see the recovery seed (often 12 or 24 words) displayed on the device screen. Write them down carefully—no screenshots, no digital storage. Confirm the order when prompted by selecting words or entering them.
5. Set PIN / Passphrase (Optional “Hidden Wallet”)
Next is setting a PIN. The PIN secures your device from unauthorized physical access. You’ll enter it on the device each time.
Many users also enable a **passphrase** (sometimes called a “25th word” or hidden wallet). This is optional but powerful: it creates a separate hidden wallet that only you can access. Even if someone steals your seed phrase, they’d also need the passphrase.
6. Activate Coins, Use Wallet
Once the prior steps are done, you can choose which coins or tokens show up in Trezor Suite. You can enable or disable them freely. :contentReference[oaicite:8]{index=8} Then you’re ready to receive, send, swap, or manage your crypto — always with explicit confirmation via your physical device.
The whole process typically takes **around 15 minutes** for a new user. :contentReference[oaicite:9]{index=9}
Why This Process Matters: Security & Assurance
At first glance, this setup may feel slow or cautious. But every step is there to prevent common risks that have caused countless losses in crypto. Let me walk you through key reasons:
Seed Phrase Safety & Offline Origin
The recovery seed (12, 24 words) is your lifeline. If your device is lost, stolen, or damaged, this seed lets you restore access. But if someone else gets it, they get access too. That’s why:
- It’s shown only on the device screen (not your computer screen) — reduces exposure to malware / keyloggers.
- You must manually write it down — digital photo or file is vulnerable.
- Confirming it ensures you recorded it correctly.
Firmware Integrity & Authenticity
The firmware you install is cryptographically signed by Trezor. The Suite/web app verifies this before accepting it. If someone tried to slip malicious firmware, the device or app would reject it. This prevents supply-chain attacks.
On-Device Confirmations & Transaction Safety
When you send crypto, the transaction details show on the device screen. You confirm ON the device (not on your computer). That way, even if your computer is compromised, the attacker can’t redirect or alter the transaction without your approval.
Passphrase = “Plausible Deniability” & Extra Layer
The optional passphrase feature (hidden wallet) adds a further dimension. If someone pressures you to reveal your wallet, they see only the “standard” wallet, not the hidden one with possibly more funds. But it also increases your responsibility: losing the passphrase means losing access.
Recovery & Disaster Planning
Knowing how to recover your wallet (using seed + passphrase) is critical. You should test recovery or at least mentally walk through it (on a spare device if possible). Many accidents happen because users misunderstand or lose one piece of the puzzle.
Intermediate Tips (For Mid-Level Users)
Once you're comfortable with the basic setup, here are some more advanced tips and considerations to level up your Trezor usage.
Advanced Backups: Shamir or Multi-Share (If Supported)
Some Trezor devices support **Shamir backup** (Splitting your seed into multiple shares) so you don’t need to store the full phrase in one location. Users can distribute shares among trusted places (safe, bank locker, family). This reduces the risk of losing the entire backup.
Use the “View-Only / Watch-Only” Feature
You might want to monitor balances from a mobile or other device without exposing private keys. Trezor supports view-only configurations where you import your public keys — you can view but not transact.
Firmware Updates & Security Hygiene
Always keep your firmware updated. Each release may patch vulnerabilities or improve features. But update only via official Trezor sources (via trezor.io/Start or Suite).
*Avoid* installing when you’re in a hurry or using untrusted computers. If possible, use your own trusted system to minimize risk during updates.
Use Multi-Signature or Multi-Device Setups
For users handling larger funds, combining multiple hardware wallets (e.g., 2-of-3 signature schemes) adds resilience. Even if one device is compromised, the attacker cannot spend funds without the others.
Regularly Test Small Transactions
Before sending large sums, try sending a small test amount. That helps you confirm the receiving address, transaction flow, fee settings, and device confirmations are working correctly.
Watch Out for Phishing & URL Spoofing
A common risk: fake sites that mimic trezor.io/Start. Always double-check the URL (SSL certificate, browser padlock). Bookmark the official site.
Offline Setup Considerations (“Air-gapped”)
Some advanced users prefer to keep the device disconnected from any network (air-gapped) and transfer transactions via QR or USB memory drives. While this setup is more complex, the principles of trezor.io/Start still apply for initialization.
FAQ: Common Questions about trezor.io/Start
Q1: Is it safe to use trezor.io/Start on any computer?
It’s safer to use a trusted, malware-free computer. While the device itself is designed to resist many attacks, a compromised PC can trick you into clicking wrong things or installing wrong files. Prefer your own machine when possible.
Q2: What if I lose my recovery seed or write it incorrectly?
Without the correct recovery seed (and passphrase, if used), you cannot restore your wallet. That means permanent loss of access to funds. Always double- and triple-check the words, store them in multiple secure places (offline), and consider redundant backups like Shamir.
Q3: Can I skip firmware updates or setup steps?
No. Skipping firmware updates opens you to known vulnerabilities. Skipping seed backup or PIN setup weakens your security. Each step in trezor.io/Start is there for a purpose.
Q4: If I already have a seed phrase from another wallet, can I use it here?
Yes — choose “Recover wallet” during setup, then enter your existing seed phrase. But make sure that seed is compatible (BIP39 / BIP32 formats). If unsure, consider creating a fresh seed and migrating funds.
Q5: What happens if my Trezor device fails or is lost?
You can recover your wallet on a new Trezor (or compatible wallet) using your seed phrase (and passphrase). That’s why the seed is critical. Always treat it as the master key to your funds.
Q6: Should I enable passphrase or keep it simple?
Enabling a passphrase gives extra security (hidden wallets, deniability). But it also raises complexity and responsibility. If you lose the passphrase, there’s no recovery. If you're handling substantial funds, it’s worth using — but for starters, a strong PIN plus seed is acceptable.